Imagine this: You and your crew spent the day replacing a vinyl liner. The job went as smooth as the liner itself. You instructed the homeowner to turn off the tap and Shop-Vac once the pool was full, packed up and called it a day.
But in the middle of the night, the vacuum malfunctions. The homeowner wakes up to find a rumpled liner. Your customer is understandably peeved and demands that you come back and fix this mess ASAP.
So much for your smooth workmanship.
“Always have a reliable vacuum,” advises Bob Cannon.
The operations manager at Secard Pools in Rancho Cucamonga, Calif., has seen a job or two go sideways. Among all the things that could go wrong in a liner installation, a vacuum should be the least of your worries — though it shouldn’t be overlooked.
Major mishaps are more likely to occur in measuring the pool, preparing it for a new liner or cutting in the return lines and skimmer gaskets. Even the weather — either too hot or too cold — has the potential to foul up a project.
“Liners aren’t hard, but they’re tedious,” says Joel Mero, sales manager at Merodynamic Pools in Atlanta. “There’s so much margin for error.”
Here, we outline the areas where liner installs are the most vulnerable to problems and what you can do to prevent them.
Measuring
Walter Gilbert was dismayed to find that a fresh-from-the-factory liner didn’t quite conform to the pool’s contours.
“It ended up being a three-foot radius corner, and I ordered a two-foot radius corner, so it just didn’t quite fit,” says the owner of Affordable Pools in Plymouth, Mass.
It was the first and last time he made that mistake.
Measuring the inside of a pool can be tricky, and there are various ways of doing this. In the event of a liner replacement, chances are you’ll have water to contend with. That’s when you use a vac pole, tape measures and plumb bobs. Use the pole to find where the walls and floor meet and where depths change or sloping begins.
Where things get especially difficult is when the pool’s interior is obscured under murky water.
“You really want to try to get the water as clean as possible so when you are feeling around with the pole you can see where the breaks are,” Gilbert suggests.
Once you have it measured, double check your work to ensure accuracy.
Because warm weather affects pliability, dealers often short change their measurements assuming that the heat will allow it to easily stretch into place.
That’s a big N-O.
It’s important to tell the fabricator when you plan to install the liner — if it’s going to be late in the summer, the manufacturer will take that into account, along with the liner’s color scheme (the darker the liner, the more solar rays it will absorb, and the more malleable it becomes) and size the liner accordingly, says Kevin Shea, vice president/general manager of the Plastimayd division of Latham Pool Products in Latham, N.Y.
If you have both dealers and fabricators shaving off a few inches, the result will obviously be an ill-fitting liner.
Preparation
The pool base may need some TLC. Be sure to patch and smooth all cracks. If it’s especially damaged, it may be necessary to replace the floor altogether with concrete or vermiculate. For a sand bottom pool, carefully trowel and remove any rocks.
“Every grain of sand is going to show up under that liner and you’re going to feel it,” says Max Taylor, owner of Magnolia Ponds & Water Gardens in Houston. “And then the customer is going to call back and say, ‘We’ve got a rock underneath there!’ And all it is is something the tenth the size of a pea.”
Closely inspect all the panels. If one is especially rusty, replace it, otherwise you can use sandpaper to remove minor corrosions, suggests Lucio Lamego, owner of Old West Pool Deck & Renovations in El Paso, Texas. “I also go over all panels with galvanized steel spray to prevent further rust,” he adds.
Seal all panel joints. Though it’s a bit more time-consuming than duct tape, silicone caulking works best.
While you’re in there, pressure-check the plumbing. The last thing you want is to be called back because the pool is losing water. “They’re going to say something is wrong with the pool liner, when, ‘No, actually, your plumbing is cracked,’” Taylor says. “The best thing to do is head that off at the pass with a pressure check.”
Also, do a perimeter check of the bead track. Look for any bent or broken segments.
Installing
Don’t overlook the manufacturer’s instructions. They’re right there on the box. The liner inside has been folded in a certain manner and should be unfolded accordingly. The liner also has stickers or labels indicating the deep and shallow ends and corners. Take note of these. “Really and truly, it comes down to following the manufacturer’s instructions closely,” says Alvin Geetan, design manager at Megna Pools, a maker of vinyl liners and inground pool kits in Toronto.
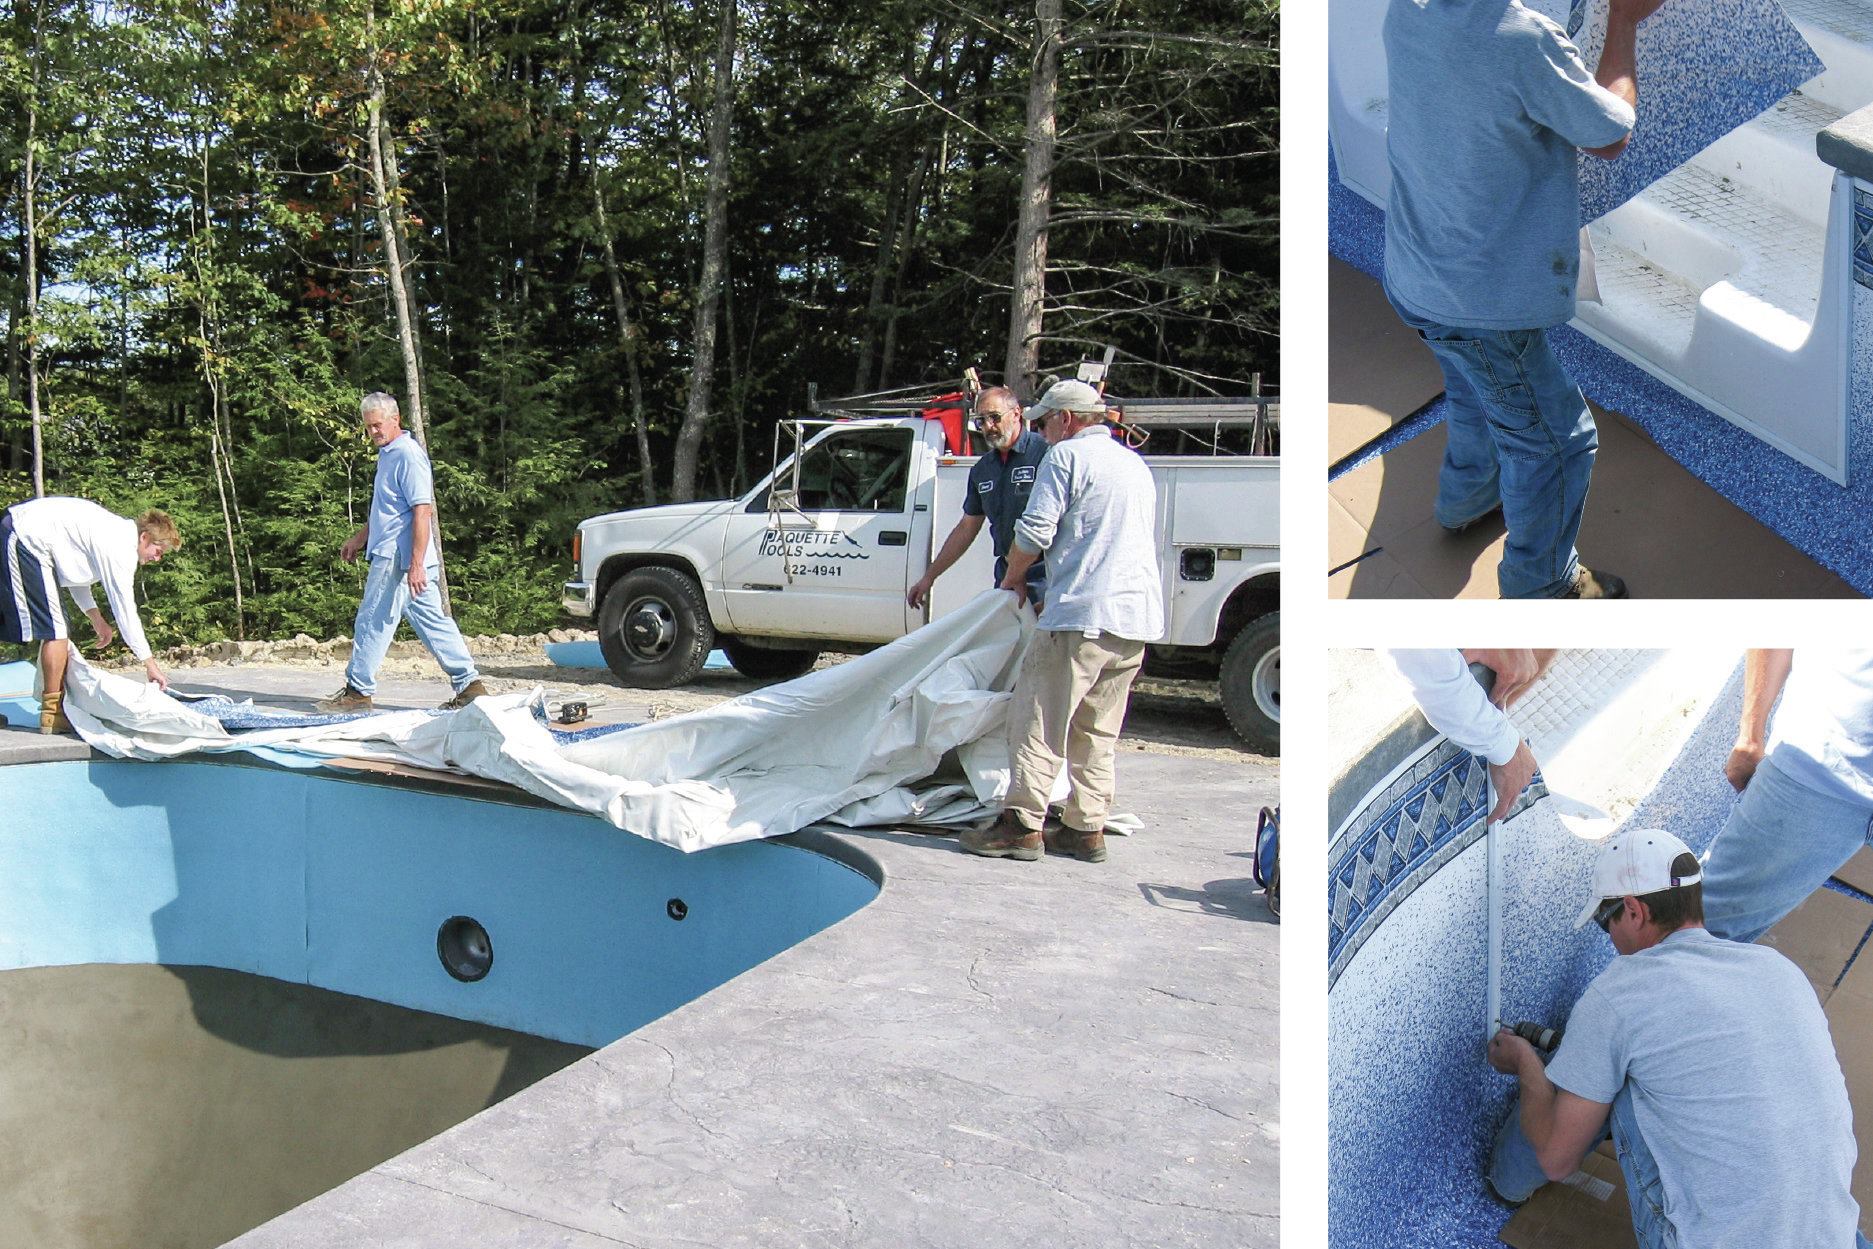
Once you have the liner positioned, tackle the stairs first. Fasten the liner down beginning with the bottom step and work your way up.
You did remember to tell the maker what step fasteners you’ll need, didn’t you?
When measuring for the replacement liner, note whether the stairs use Velcro, rod loops or a bead track. If you don’t, the liner could come from the fabricator without a way to attach the liner to steps, cautions Ed Nejame, Jr., co-owner of Nejame and Sons in Danbury, Conn.
Consider installing the faceplate after the liner has been vacuumed into place.
Take the weather into consideration as well. If you’re installing a liner with a dark color scheme, Shea recommends placing it early in the morning when it’s cooler. Wait until peak day and the liner could absorb too much heat and become too pliable.
Conversely, cold weather can make the liner too stiff. (Some manufacturers will void their warranties if a liner is installed when temperatures are below 45 degrees.) While it’s best to do the job in warmer climes, sometimes this can’t be avoided.
Mero did more than 309 installations last year, some of them under tight deadlines in less-than-ideal weather. Realtors, in a rush to close a deal on a house, will want improvements made to the pool, pronto.
“Of course you’re going to get more life out of a liner if it’s done in appropriate weather, but there are things you can do,” Mero says.
Solution: Boil water in a teakettle on a camping stove and pour it directly on the bead and wall section of the liner. Hot water will not damage the material or the print pattern. Once sufficiently softened, the bead should snap easily into the track.
Whatever the weather, avoid overly stretching the material.
“Remember when you were a kid and you got that nice cherry red balloon?” Taylor poses this question to illustrate a point: That cherry red balloon, once blown to capacity, turns pink. The same concept can be applied to vinyl liners. By stretching a liner, you’re diminishing its true thickness, minimizing its life expectancy.
After the liner is in its track, make sure that the wall is aligned with the floor by looking for diagonal wrinkles. Diagonal wrinkles indicate that the bead is slightly ahead of the floor portion directly below. Adjust accordingly.
Vac and fill
By now the liner is clipped into place. It’s time for the final steps. You’ve come this far. Attention to detail at this stage is as crucial as ever.
Position your vacuum so that it’s located centrally, whether you are feeding it through the mouth of the skimmer or between the liner and the wall. Create a tight seal with duct tape. (Some dealers swear by liner vacs which are specifically designed for liner installations. They often fit over the skimmer, eliminating the need for duct tape.)
The suction should smooth out the liner. If not, you’ll have to flatten wrinkles manually. (Be sure to take off your shoes or walk on cardboard to protect the liner.) If it’s a large pool, say, 20 feet by 40 feet, or an L-shape pool, Geetan suggests using two vacs.
You might need to weight the shallow end of the pool to prevent the liner from sliding toward the deep end. Build a dam at the break with water tubes and begin filling the shallow end. This will help seat the liner in place.
To prevent wrinkling and tearing, cut in the returns and skimmers and put the faceplates on after the liner has settled under several inches of water.
This is your last chance to tackle any remaining wrinkles, which you can iron out using a plumber’s plunger.
Get your fill, instantly
Rather than fill the pool with a garden hose, which could take a day or two, some installers opt to truck the water in for a rapid replenishment. The advantage here is you’re eliminating the risk of any overnight mishaps, such as the vacuum malfunctioning.
“Nowadays we’re all doing water trucks,” Gilbert says. “They can bring the water to you and dump 9,000 gallons in a pool in 20 minutes.”
Quick tips
1) Measure and measure again. Make sure the fabricator is getting all the pertinent information, such as dimensions, pool’s geographic location, and the time of year you’ll be doing the install.
2) Thoroughly prep the pool bottom and walls.
3) Take into consideration the weather and the color of the liner. This can greatly affect the liner’s pliability.
4) Remove all footwear, particularly sneakers and work boots, prior to getting into the pool for installation.
5) Create an airtight seal between the panel joints and coping, and pressure test all lines.
6) Stairs? Start with those first, using rods and/or Velcro, or other methods of fastening. Start from the bottom step and work your way up.
7 Ensure the liner is wrinkle-free before turning the vacuum on.
8 To remove wrinkles from the bottom of the floor in the shallow end, a plumber’s plunger will do the trick in 12 inches of water or less.
Tips courtesy of Kevin Shea, vice president/general manager of the Plastimayd division of Latham Pool Products in Latham, N.Y.