When widespread discoloration occurs in an otherwise healthy plaster job, professionals have an intriguing tool at their disposal that can correct the problem under certain conditions: Torching.
Through this process, the individual applies heat from a flame directly to the surface to simultaneously remove excess water and whiten the surface. Here, experts explain the process and when it is appropriate.
The Basics
Applying heat to the surface accomplishes two things. First, it wicks or draws out moisture that may have been trapped in the matrix from such situations as poor hydration or uneven water-to-cement ratios. Secondly, it produces carbon dioxide, which reacts with the calcium hydroxide to form calcium carbonate, which gives a white appearance. The last effect is called carbonation.
The wicking effect makes torching particularly appropriate for discoloration caused by water. This can include issues from installation, such as poor hydration or calcium chloride problems, or surrounding conditions, such as pooling water, flooding, leaking, broken pipes, drip marks and discoloration from sprinklers or rain puddles. It also can address a number of other issues.
While the process can work wonders, it does not suit all pools. It is best for large-area discoloration. It is not cost-effective for evening out smaller discoloration spots, because you’d have to torch the whole pool to ensure a consistent surface.
A potential candidate for torching would have a surface that otherwise is in good shape. It would not work on old, weathered surfaces. There should be no cracking or delamination. The integrity of the plaster matrix should be mostly intact and the material up to a few years old. “There has to be a necessary soundness to the material before you do this technique,” says Greg Garrett, owner of Applied Materials Technologies, based in Phoenix. “You look for a surface that’s in reasonably good shape, other than some extraordinary discoloration.”
The pool will need to be completely dry during this process — and empty for anywhere from a couple days to a couple weeks. For this reason, pools in high water tables may not make good candidates. If water will continue to weep through the hydrostatic relief, then it won’t work.
Torching is best performed in colder weather — anywhere from 33 to 69 degrees Fahrenheit, Garrett advises. If the weather is too warm, the material could dry rapidly enough to cause cracking, he says.
Proper preparation
The torch can’t work its magic unless the specialist has created optimal conditions.
After draining the pool, clean the surface and treat it with a light acid solution with soap in it. Garrett has used Dawn dishwashing detergent or other products containing surfactants, which reduce surface tension. This helps reduce fumes while allowing you to clean the surface.
The acid bath also opens up the pores of the surface to provide an escape route for moisture trapped in the matrix when the torch initiates the wicking process.
In some cases, this simple act begins to even out the color, says Jay Eaton, president of Phoenix-based Cal Plastering. “Sometimes there’s no torching needed,” he says. “Sometimes we’ll do an acid wash on it to open the surface up and allow the moisture to come out, maybe leave it open for one to three days. You may find that once you’ve done that, it’ll even up all by itself without any additional work.”
The acid bath also helps rid scaling and staining. “People think you can just go out and torch the surface,” Garrett says. “But you have to clean it first. It’s just like how you never paint over dirty old paint — you clean and prep it first.”
You don’t want main-drain grates, inlets and other fittings to melt from the torch, so these should be removed before torching begins. There is one exception — threaded fittings. Leave these in to protect the threads underneath. Otherwise, the torch will melt the threads, requiring a lengthy process to cut them back in. “It’s cheaper to replace those plastic fittings if you burn them,” Garrett says. “Just remove the burned fittings, install new ones, and your threads are still intact and in good shape.”
Next, remove all remaining water with a wet-dry vacuum. This includes the water from the main drain area and fittings.
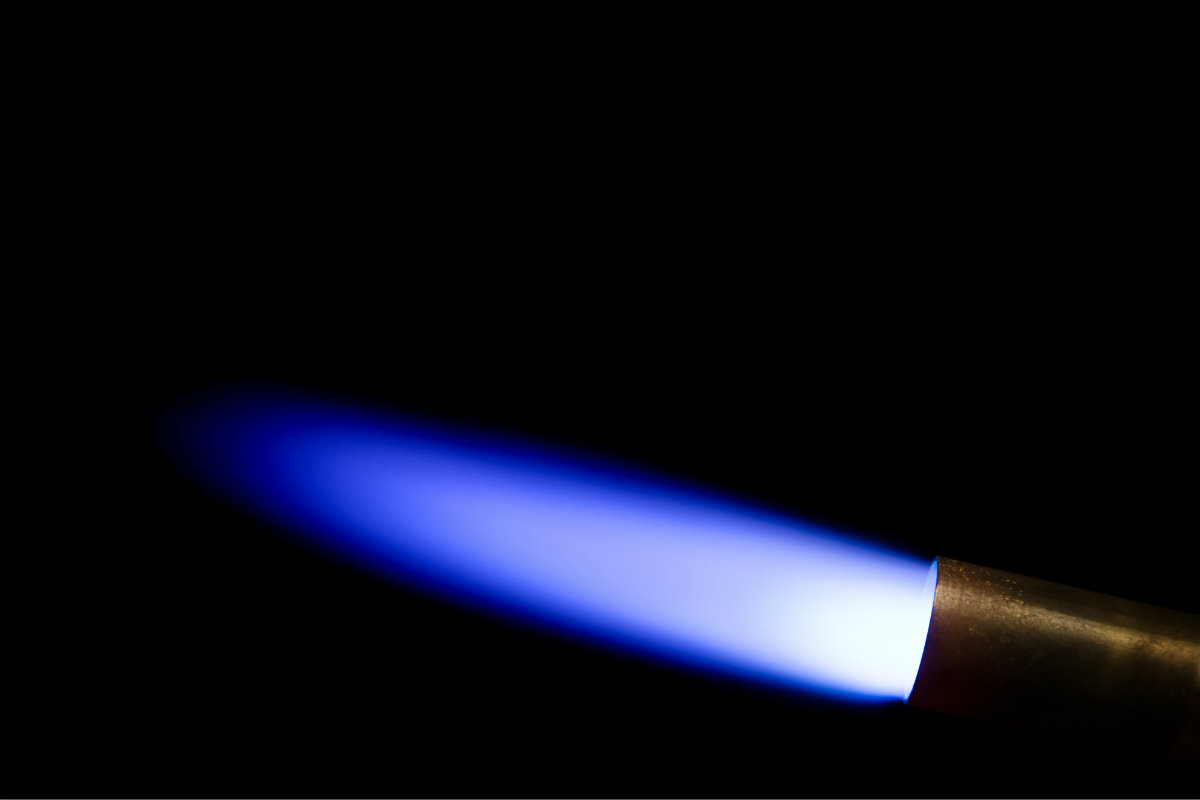
Wielding the flame
Workers will use a torch known as a weed burner and apply the flame to the plaster surface.
The key is to move the flame at all times. Do not keep it poised on one spot. Otherwise the plaster or other material will get too hot and potentially pop. While torching, you’ll survey the surface for discoloration, and you’ll need to work more on darker spots, touching it with the flame multiple times. However, make sure to remove the flame if the surface becomes too hot to leave your hand on it. “Don’t ever let the flame stay still in an area,” Garrett advises.
If you can see the moisture drying very quickly, this may also indicate that you’re heating it too much, Eaton adds.
“You cannot heat the plaster to the point where it looks like it’s changing a lot. If it is, you need to back off or move faster — probably a combination of both. You need to go lightly over the surface to gradually heat it up versus doing a fast heat-up.” Think of it more like warming with a toaster oven on low, rather than a microwave, he says.
This need for constant motion means workers cannot become distracted. If they try to talk to somebody and leave the torch in one spot for too long, a chunk of plaster can blow off the wall.
Maneuver the torch so it hits what you need to hit, and avoids what you need to avoid. If you’re working near the tile line, for instance, hold the flame high and direct it down the wall, working away from the tile. You’ll also need to continually adjust the distance from the surface. When first starting a new propane tank, the flame can reach 5 to 6 feet from the nozzle, Garrett says. But as propane is used up, the flame shortens.
As the propane burns, the tank will ice up because the fuel is used so quickly. This causes the color of the flame to change. Only torch with a clear or blue flame. Once it turns yellow, orange or red, it indicates the wrong air/fuel mixture and could result in the deposit of soot on the surface. Change the tank, work until that one freezes, then go back to the original if it has thawed out. Garrett recommends that each person in the pool bring at least three tanks.
Of course, the number of workers on the job will vary depending on the pool size. Two people can typically handle a normal 20,000-gallon pool, these professionals say.
If two individuals will suffice, they can start at opposite ends of the pool. Each pro will typically work a section that’s about 3 feet wide, starting from the top of the wall and moving down. “You start underneath the tile and burn down to the floor,” Garrett says. “Then you move a couple feet and slide your [propane] tank. You keep doing that so you’re constantly shuffling your feet and moving the tank.”
Garrett typically has his crews work clockwise. They should torch the walls first, as the process works more quickly on vertical surfaces. Gravity causes the water drawn from the walls to flow down, so it doesn’t stay on the surface very long.
Check your work and don’t rush
Chances are, you’ll need to make a number of passes over the pool to achieve the in-depth carbonation you need.
After the pool has been torched and looks uniformly white, it’s time to make sure the carbonation has gone in-depth enough. Wet down the pool with a high-pressure nozzle, soaking the entire surface and inundate the pores. When doing this, some gray may appear if the carbonation didn’t achieve a sufficient depth and some of the water did not wick out.
If darker areas appear, then you may need to drain and dry the pool again and go through another round.
This is a process, with jobs typically taking three to 10 days, Eaton says. Professionals should make sure to avoid the most common mistake made by novices — rushing the job. Without patience, you risk inadequate carbonation from not working enough, or blowing out pieces of plaster by applying too much heat.
When you know for sure the job is done, there are additional steps you can take to address residual roughness or spalling that can occur. For instance, paper-thin spalls can form from the torching, where latents may pop off. In these cases, Garrett might polish the pool with 200-grit diamond pads.
If any of the plaster did blow out from excess heat, a patch will need to be done. As a bonus to customers Garrett may offer to place a small tile inlay in the space.