John Melder
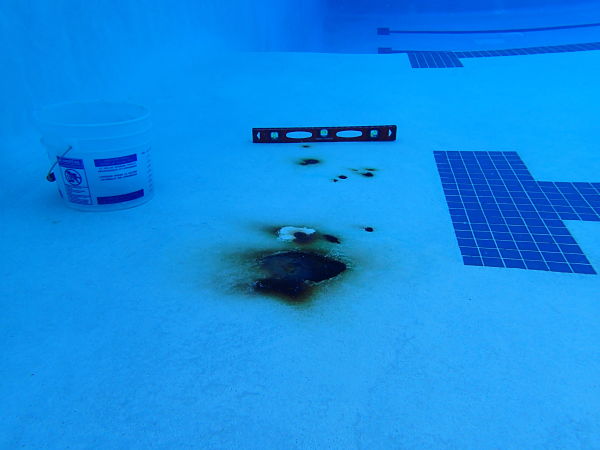
Before: A municipal pool undergoes a rebar repair operation. The rust stain shown in the top photo only hints at the extent of damage under the shell.

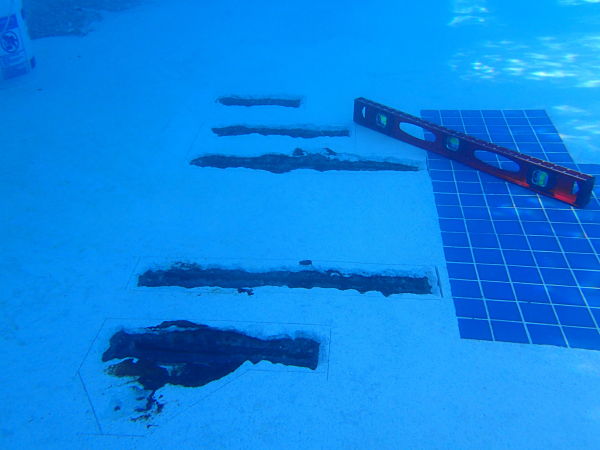
During

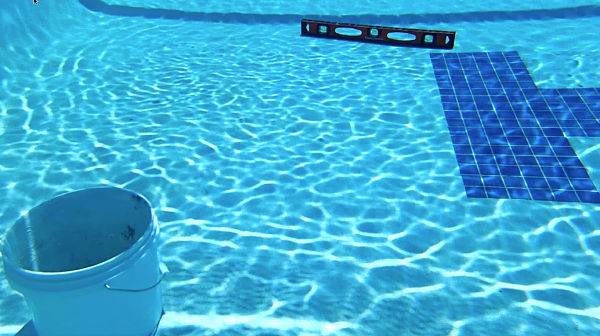
After
A rebar stain is more than a cosmetic blemish. It’s a cancer.
That’s how some pool pros describe this corrosive occurrence. Though they realize it may be a tad indelicate to compare a pool stain to a life-threatening disease, there really is no better way to put it.
Below that unsightly surface stain is a scourge that’s eating away at the steel reinforcements. Left untreated, the shell will crack, exposing more rebar, resulting in more corrosion until we’re left with the complete structural failure of the pool.
It’s nothing to take lightly.
The good news is you can solve the problem once and for all with the proper tools and a bit of creative ingenuity.
The best part? You might not even need to drain the pool.
Oxidation origins
Before you begin chipping out the plaster to get to the source of the problem, it helps to understand why these stains occur in the first place.
A common misconception is that it’s the pool builder’s fault for installing rusty rebar.
That’s not the issue. Most rebar comes off the truck with at least a little rust. Not only is this not a problem, but some say a bit of rust can actually strengthen the bond between the steel and cement.
When properly encased in concrete, steel will not rust. This is because concrete is high in alkalinity, which neutralizes oxidation and forms a protective coating on the rebar.
Problems occur, however, when nozzlemen do not provide thorough coverage around the reinforcement.
Example: As the shotcrete or gunite passes through the bars during application, a gradual buildup on the face of the bars can obstruct the material from reaching behind the rebar, leaving the backside exposed. Called “shadowing,” this creates voids within the shell where the steel will corrode. The rusty oxidation will eventually bleed to the surface, staining the plaster.
Shallow rebar also is prone to rust. This can occur around curves in the wall where nozzlemen were not able to use shooting wires to gauge depth of coverage. Not knowing how deep the concrete is, it’s easy for the finisher to overcut, leaving only a thin layer to cover the bars. That’s why you’re more likely to find rebar stains in freeform pools.
Other problem spots include step areas, benches and tight corners where it might be difficult for pneumatically applied concrete to properly build up around the steel.
Improper drainage can be a contributor, as well. Most codes require 3 inches of concrete between earth and rebar. However, this may not always provide adequate protection in perpetually soggy soil.
“If a wall gets saturated once, it’s not that big a deal,” says Mike Stinson, operating as Mike the Poolman in Folsom, Calif. “But if it’s continually saturated, eventually things are going to start to rust.”
Tie wires also can be the cause. Sometimes they’re accidentally left sticking up out of the concrete and exposed to the water after the pool has been finished. The soft wire disintegrates, leaving a small hole in the plaster and shotcrete.
“I like to make the analogy that it’s like lighting a fuse to a firecracker,” says John Melder, owner of Underwater Operations in Scottsdale, Ariz.
Sometimes, the source of the problem is due to just plain bad rebar work, as Stinson shows in this video:
And just because the stain is small on the outside, that doesn’t mean the rust is contained within that spot.
“If a homeowner tells you ‘Oh, that stain has been there for about five years,’ then you know it’s going to be farther spread,” Stinson says.
Dive or dry?
No matter the cause, it’s vital that the rebar be remedied immediately to stop the spread of corrosion. This can be done one of two ways: Wet or dry.
As the name of Melder’s service suggests, he prefers to do this submerged, mostly in the interest of speed. On small jobs, he’s in and out of the water in an hour or two, sparing the homeowner from a drain and refill.
Plus, as Melder puts it, “It’s a much nicer, neater job under water.”
Rebar repairs kick up a lot of dust and debris, which could impede visibility. This is a job that requires a keen eye, which is another advantage to performing these operations in a full pool.
“To do it dry, you have to sit there with a Shop Vac and a spray hose to clean the cavity that you’re working in so you can see what you’re doing,” Melder says. “In the water, I’m able to fan my hand over it, so that it’s clean and clear. I can see very well what I’m doing.”
Stinson likes to sport a wetsuit for the task, as well. However, jobs requiring serious reconstructive surgery, so to speak, should be done in an empty vessel.
“I could do a giant patch under water,” Stinson says. “However, it’s going to be lumpy and wavy and look terrible.”
Either way you decide to tackle it, the following tips apply.

John Melder
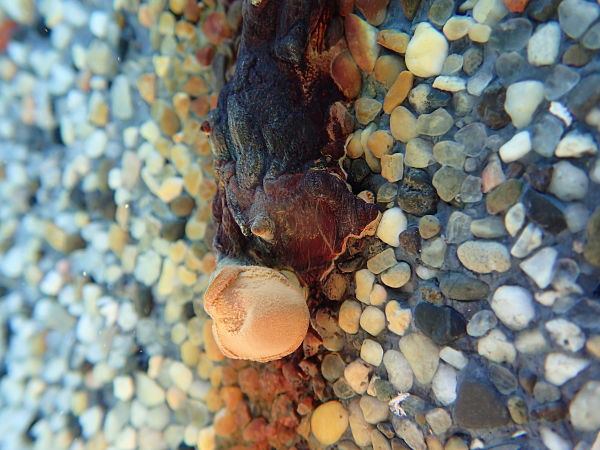
Rust stains from rebar are never pretty, but they're particularly unsightly when they tarnish a beautiful pebble finish.
Confronting corrosion
Begin by chipping out the stained plaster.
A 4-pound hammer and 1-inch cold chisel should do the job. Then, using a pneumatic jackhammer, dig into the gunite to expose the rebar. The oxidized steel will appear disintegrated, bubbly and molten-like.
“A lot of times it’s eaten away to the point where there is no rebar left or only a small strand of it,” Melder says.
Next, track the rust’s journey by chipping along the length of the rebar, either vertically or horizontally — or both in extreme cases. Once you’ve come to clean steel on both ends, cut the piece out. How? By any means necessary. Cutoff wheels work, so do die grinders. However, some locations are too tight for power tools. This is when hacksaw blades and bolt cutters come in handy. You’ll want to make the cuts a few inches into the unspoiled steel to ensure you’re not leaving any rust behind.
“When I feel comfortable that I’ve reached the end of the rust … I cut it and examine the rebar to see if there is any rust on the backside,” Melder says.
If he believes all the rust is contained on the piece in his hand, he’ll draw a rectangle or square around the cavity. He uses this as a reference to chip clean, smooth edges in the plaster. This will help create a neat, uniform patch that bonds directly to the concrete.
Next, pack the cavity. While Melder prefers using his own proprietary formula, other pool professionals have found success using a grout material or hydraulic cement. While performing this step, they are careful to leave a ½ inch clearance to allow for the layer of plaster patch on top.
Word of caution: If you’re performing this task dry, give the cement adequate time to cure. Pros have seen some repairs go south because contractors prematurely applied the plaster patch-up material over the not-quite-ready cement. These inadequate subpatches will expand and contract independent of the shell, causing cracks in the finish. Sometimes the subpatch will even fall out like a filling from a tooth.
If the case is particularly bad, the remaining rebar may be vulnerable to more rusting, and the customers may find themselves back where they started.
“I can dig into the pool and reach a third-party material that I know wasn’t put in there upon construction and then I bump into the rebar that’s rusty,” Melder says. “It’s a different color. It’s a different mixture of material. I can hold it in my hands and it’s a different weight.”
Mix and match
For the plaster patch, simply mix up the quick-set plaster into a mashed potato-like consistency, ball it up in your hands, pack the cavity and smooth it over.
The tricky part, however, is getting the patch to match. Pros experiment with coloring agents with hit-or-miss results. Even if the repair appears seamless, the patch could change color over time, so brace your customers that the end result may not be perfect.
And don’t be surprised if some jobs require a do-over.
“I precondition my customers and tell them that the patch likely won’t match, but I will do my best to get it as close as I can,” Stinson says. “That way they don’t expect it to match, and if I get lucky and it does match, I look all the better for it.”
For more exotic finishes, such as pebble and glass bead, it helps to have a relationship with the plasterer’s supplier to find as close a match as possible. Most are willing to share their formulas, especially if you’re working as a subcontractor to repair a pool under warranty.
“I can take some ingredients from their recipes and mix it into my stuff and make a consistent patch,” Melder says. “On a lucky day, and I did a good job, you wouldn’t be able to tell the difference.”
And, obviously, a job involving these materials can’t be accomplished underwater, as you’ll need to wash back the plaster to expose the aggregate.
Replace rebar?
Another consideration is whether or not to replace the rebar. Pros seem split on this.
Stinson is one who feels it’s always necessary to replace what he removed. This can be done through a technique called lap splicing, whereby you overlap a longer piece of rebar into the existing reinforcements. Melder, however, doesn’t believe this is necessary.
Ultimately, this is a decision that may best be left up to the pool owner.
And there are some instances when a pool is too far gone to be rescued through a rebar repair. For example, if the pool appears rusty and the plaster has reached its expiration date, it might be best to have the pool refinished and address the problematic rebar in the process.
“It does cost more,” Melder says. “But ultimately, they get a better product.”
