


“Are you the type of person who dives right in when trying something new? Or are you someone who hangs back to see if a new idea floats before taking the plunge?
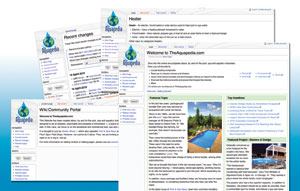
If you’re among the first group, you may already be familiar with using a wiki — a Web-based encyclopedia that can be viewed and edited by many users at once. If you’re in the second group, however, the thought of adding to a wiki can be a little intimidating. But wiki software isn’t as difficult to use as it might seem, and Pool & Spa News’ new industry wiki The Aquapedia (www.theaquapedia.com) is a good place to start.
“The system is designed for those who may not know exactly what they’re doing,” says Margi Millunzi, special projects editor for Pool & Spa News and Aquatics International. “It’s a lot like using any basic word processing program. Once you’re used to it, it’s quite user-friendly.”
Peder Halseide, a Ft. Collins, Colo.based communications systems consultant and founder of the wikiexpert.com site, says that for a wiki to be successful, it’s important to contribute. “If the information isn’t out there, don’t wait for someone else to add it,” he says. “Do your research, write up the information, and then share it with everyone.”
This guide can help you learn the basics of registering for an account, adding a page, and adding and editing content on The Aquapedia. Once you’ve reviewed these three steps, log on and jump right in — the wiki water’s fine.
STEP 1: RREGISTER FOR AN ACCOUNT
Before you can add a page or edit content, you must first sign up and log in.
A. Go to the top right corner of the home page and click on “Log In/Create Account.” You’ll see a box with the question, “Don’t have an account? Create an Account.” Click on “Create an Account.” (If you’ve already registered, you can log on at this screen.)
B. Choose a user name and password, enter your e-mail address and your real name (optional), and click “Create Account.”
TIP: Although giving your real name is optional, it’s a good idea because it will allow information you post to be credited to you.
STEP 2: ADD A PAGE, IF NECESSARY
Search for a topic: if the information doesn’t exist, create a new page.
A. First, check to make sure your topic doesn’t already exist by typing the term into the search box in the left navigation column. If the term doesn’t appear in the search results, then you’re ready to add a page. (Be sure to read through the other results in case your term is listed in another format — abbreviated, for example. This will help avoid duplications.)
B. There are two options for adding a page:
Adding a page to an existing entry: Because a page isn’t yet started under your exact term, the listing will appear in red instead of in the normal link color. If you click on the term, you’ll be taken to a prompt where you’ll be invited to start a new page.
Adding a new individual page: Type the term, exactly as you want it to appear — this includes any appropriate capitalization — into the search box in the left navigation column. Then, click “Go.” On the search results page, a note will appear: “There is no page titled ‘xxxx’. You can create this page.” Click on the “create this page” link, and you’ll be able to add new content.
TIP: Be sure to type in the term/name/etc. exactly as you want it to appear. This will be how the page is labeled in the future; a misspelled term will be difficult for users to find.
TIP: Don’t have this tutorial handy at your computer? Click the link on The Aquapedia homepage labeled “Getting Started” to find information on creating and editing pages.
STEP 3: ADD AND EDIT CONTENT
The Aquapedia has a basic template for creating content — meaning you don’t need to know any special programming language.
A. For a new page, begin typing your information into the text box. The page title will already exist — it’s the topic name you chose. To edit an existing page, click on the “edit” tab at the top of the page, and then type into the text box. You can also contribute to a dialog about information on a page by clicking on the “discussion” tab.
B. Format your information by highlighting the text you want to change, and then selecting one of the editing buttons at the top of the text box. You’ll find a description of each button and how the coding will look in the text box. (See the Editing Buttons table for a preview.) You can see how the wiki page will look before you save it by clicking on the “Preview” button at the bottom of the page.
C. Once you’re finished adding and formatting text, click on the “Save Page” button at the bottom of the text box. Congratulations — you’ve added to the industry’s overall knowledge!
TIP: You’re always given the option to preview a page before you save it, so you should be able to spot any errors before it goes live. Otherwise, don’t stress too much; everything can be edited or adjusted if it doesn’t turn out quite like you expected.
TIP: Remember: Any content you write for The Aquapedia must either have been written by you, or copied from a public domain or similar free resource. Information found on the Internet is protected by copyright law.
RELATED LINKS
- Deep Waters
The new Aquapedia wiki for the pool and spa industry gives fresh meaning to the term “group project.”
- 5 Ways to Wiki at Work
Wikis are more than a pleasant distraction — they are also powerful business tools.
EDITING BUTTONS
Icon: [icon: B] Function: bold Appearance in Editing Pane: ***bolded item*** |
|
Icon: [icon: I] Function: italics Appearance in Editing Pane: “italics item” |
|
Icon: [icon: Ab] Function: creates an internal link (a link to another Aquapedia (a link to another Aquapedia topic that’s already been or will be created) Appearance in Editing Pane: [[internal link item]] |
|
Icon: [Globe icon] Function: creates an external link (a link to another Website; remember to type “http://” before the Web address) Appearance in Editing Pane: [http://www.hanleywood.com Hanley Wood] |
|
Icon: [icon: large A] Function: adds a subhead to the page (the subhead is automatically underlined, so you don’t have to add an additional line) Appearance in Editing Pane: == Subhead == |
|
Icon: [Picture icon] Function: adds an embedded file to the page (all embedded files need to be uploaded to the Aquapedia site; you can’t link to images hosted on external Websites) Appearance in Editing Pane: [[File:Example.jpg]] |
|
Icon: [Trumpet icon] Function: adds media files (such as .pdf and .wav files) to the page Appearance in Editing Pane: [[Media:Example.pdf]] |
|
Icon: [Square root icon] Function: adds math formulas to the page Appearance in Editing Pane: |
|
Icon: [icon: W circled and crossed out] Function: ignores any wiki formatting Appearance in Editing Pane: plain text |
|
Icon: [icon: Cursive writing] Function: adds a signature line to the item Appearance in Editing Pane: –Theaqua1 03:11, 16 November 2009 (UTC) |
|
Icon: [icon: —] Function: adds a horizontal rule (avoid overusing this formatting, as it can make the page difficult to read) Appearance in Editing Pane: — (on its own line) |