Replacing a bad bulb may seem like a no-brainer. But whenever you’re dealing with water and electricity, caution must take top priority.
When selecting a replacement bulb, it’s important to know the Underwriters Laboratories’ requirements and National Electrical Codes. You’ll also want to check the wattage, manufacturer and style when choosing the replacement.
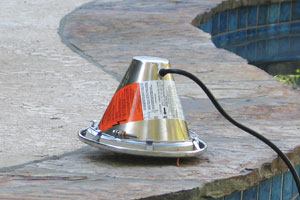
Lights are approved for use with specific niches. A label in the niche lists the individual part numbers for compatible lights. Plus, on the light itself will be a list of the types of niches with which it can be used (see photo below, right). This will help you pick the correct replacement.
The lifetime of pool bulbs has grown longer over time. Older ones lasted approximately 1,000 hours, but today’s models will shine for about 3,000 to 4,000 hours, depending on how often the light is used.
Generally, these underwater bulbs will need to be changed every year to 18 months.
Keep in mind, a nonfunctioning bulb could be the symptom of another problem. You need to check that the power is making its way from the source to the load (the bulb or the switch that operates it). You want to make sure it’s not the GFCI or the breaker. Other factors can be involved, such as a faulty switch.
To make sure, find the pool’s electrical breaker near the equipment pad and set your multimeter to AC voltage. Put one of the meter contacts on the neutral post and another on the hot side (or the source side and switch side). It should read 120 volts.
If the switch for the light is working fine, check the cord from the light to the junction box. If there is voltage on the load side of the wire feeding the cord, you have power and the problem is a bad light. Use a megger (megohm-meter) to check the light fixture.
The following 10 steps will take you through the entire bulb-changing procedure, ensuring a successful and safe light replacement.
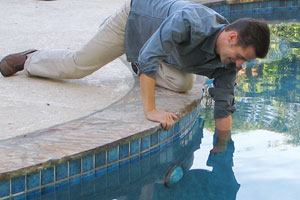
| 1 | Shut down the power to the pool. You don’t want to be working with live wires around the water. If the subpanel is not within the line of sight from where you will be working, close it up and lock it, or place a sign on it. Write something such as: “Warning: Electrical pool work under way. Do not turn on power!” The last thing you want is a pool owner coming home and turning the power back on while you’re working. |
|
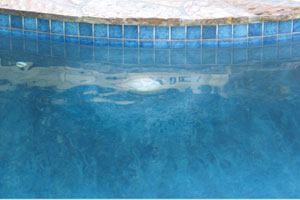
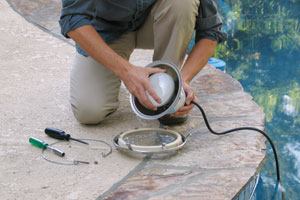
| 2 | It’s time now to remove the light fixture from the niche. From the edge of the deck, lean over and loosen the screw. Once it’s unfastened, the fixture should pop right out of the niche. The NEC requires at least 4 feet of cord, so you should be able to pull the entire fixture right up onto the deck. |
|
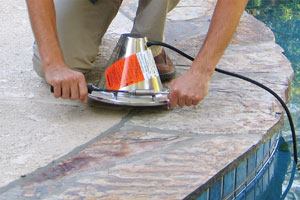
| 3a | Before opening the fixture to remove the bulb, do a thorough inspection. Check to see if the back housing is coated with anything that looks a little like algae. This coating can act as an insulator and not allow the bulb to cool properly. It could overheat, which causes the bulb to turn off. Veteran techs say if the owner reports that the light comes on for five minutes and then turns off, and cycles on and off, this is probably what is causing it. | |
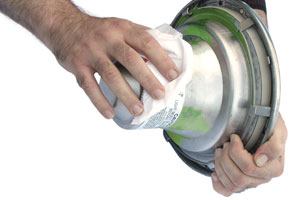
| 3b | Use a cloth to wipe it down. Then, check the gasket and how it interfaces with the fixture. Inspect the grommet where the cord enters the light housing. Look for wear and tear, cuts and nicks, and corrosion. If these symptoms are evident, you will probably want to change the entire housing fixture rather than just the bulb. | |
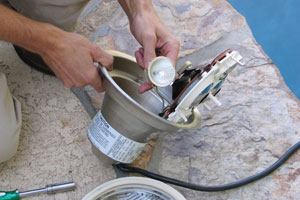
| 4 | If you’ve determined that the fixture is in good shape, it’s time to take it apart to get at the bulb. Remove the face ring, which is held on by a clamp with a single screw or a series of little tabs. Then take off the gasket. It may seem to act like a suction cup, pressed onto the housing. Get under it with a flathead screwdriver and pop it out, and the lens and the gasket will come out as one piece. | |
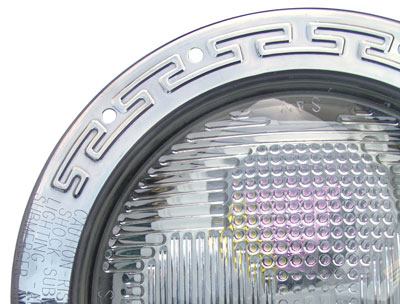
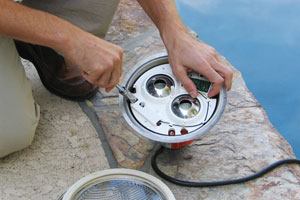
| 5 | Do another quick inspection, this time of the interior of the fixture. Look for water, corrosion and so forth. If the fixture is in good shape, it’s time to change the bulb. Most types of underwater lights screw into an Edison-base socket, just like the lamp in your living room (see top, right). Others may be slightly different, such as halogen bulbs, which will snap into place. With a SAm light, you’ll have to remove a copper plate once the lens of the fixture comes off (see bottom, right). The SAm light has a color wheel and a motor, which are situated on the plate. They are held in place by four screws. When the plate is removed, you’ll have access to the bulb. | |
| 6 | With the new bulb in place, reassemble the fixture. Never recycle the gasket. Always replace it with a fresh one, even if it wasn’t the cause of the problem. Note: Some bulbs use specific gaskets, depending on what kind of mold they have. | |
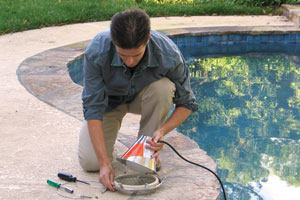
| 7 | Before putting the light back into the pool, turn the power on and check if the bulb illuminates. Do this quickly or the bulb will overheat and break. You can destroy internal components if you leave it on too long while it’s out of the water, experts warn. But some models have a built-in thermal cycle switch, which is preprogrammed to shut down at certain temperatures. If the light works, you can now prepare to place the fixture back into the niche in the pool wall. Remember to turn the power off again before undertaking this step. |
|
| 8 | Wrap the cord around the fixture. Don’t do it too tightly lest you insulate the fixture, resulting in the same on/off cycling that the aforementioned algae-like coating can cause. Lean over the deck and slide the fixture back into the niche. Line up the screw hole at the 12 o’clock position, with the tab at the bottom (6 o’clock). Twisting in the pilot screw can be difficult because there are several holes through which it must pass. Take your time; it’s a matter of lining it up correctly. |
|
| 9 | While placing the fixture into the niche, watch for bubbles because sometimes there are air pockets between the face ring and fixture. It should clear out quickly, though. If the bubbles continue, there’s probably a leak. The bubbling shouldn’t go beyond a minute, techs say. If it does, it means the gasket isn’t sitting on the fixture properly or the screw in the faceplate isn’t tight enough. This means you’ll likely need to reassemble the unit. |
|
| 10 | Once you have the pilot screw on the faceplate lined up properly, you’ll be able to tighten it. Secure it snugly, but do not overtighten. If you do, it will be difficult to remove it the next time the bulb has to be replaced. Turn on the light to double-check it one more time. If it comes on, you’ve successfully completed the job. |