A lot of weight rests on the package-pool wall panel. There are tons of earth on one side, thousands of gallons of water on the other. They’re largely responsible for the long-term success of the pool and the fit of the liner.
To guarantee lasting durability and success, follow this primer.
1. Check the excavation.
Precision at this stage will help position each panel properly.
Check elevations on the shallow-end floor and deep-end shelves. These surfaces should be level and elevated so the top of the panels will meet the bottom of the coping.
Then draw the outline of the pool into the hole, so you can locate where the panels go.
2.Set up a level foundation for the panels.
In addition to an expert dig, you’ll need a foundation that you can make perfectly level and to the exact right height. Many builders pound grade blocks into the shelf at intervals.
Some like to place one of these 4-by-8-by-16-inch, solid concrete blocks underneath each panel joint. Measure around the pool, mark where panels will meet, then position each block so half sits on either side of the joint. Pound it into the ground, making sure it is level and at the right elevation.
There are alternate methods. Tommy Johnson, president/owner of Johnson Pools & Spas in Huntsville, Ala., generally uses 2-by-4-inch wood stakes. He uniformly spaces them approximately 3 feet apart and sets them 1- to 1-1/2 inches off the ground. This allows concrete to ooze underneath the panels when the foundation is poured, additionally locking them in place.
If the pool will sit in a higher water table, you can use gravel as your leveling device. This also allows ground water to drain.
“It’s easier to work with, so it goes quickly,” says Jesse Anderson, construction supervisor at Burton Pools and Spas in Fort Smith, Ark. “Typically it ends up anywhere from 1- to 2 inches of gravel.”
3. Choose a starting point for the panels.
Begin setting up panels at the shallow end, so you can stand on the floor, rather than balancing yourself on the shelves while setting, leveling and stabilizing the first few panels.
On rectangular pools, many crews begin at a corner, so the two sides can support each other. On freeform pools, you can begin anywhere, since the curved panels hold themselves up.
Many prefer to start at the gap where the stairs will go. “If your [panels are] off, it’s an easy area to pull and push the panels to make up for the lost space,” says Michael Truehart, owner of True Blue Swimming Pools in Dix Hills, N.Y.
You can also start at the pool’s center line. Since the pool light often sits there, it makes a good reference point.
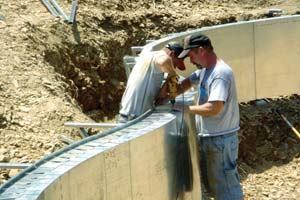
4. Erect the panels and braces.
You will prop the panel up and bolt it to the next one, using the turnbuckle or threaded-rod system provided.
There is a row of holes going down each side of the panel. Put bolts or dry pins in the uppermost and lowest holes first, adjusting them until the fronts of each panel are flush. Then put in the remaining bolts. Use them all, or you’ll leave a weak spot.
In the bottom-flange holes, place a rebar stake and pound it about 12 inches into the ground. This helps stabilize the panels when you attach the brace and pour the foundation.
Finally, attach the braces to the back. Adjust until everything is level and plumb.
5. Seal between the panels.
Cover the panel seams with duct tape to keep them from showing through the liner.
Johnson takes an extra step to create an air-tight seal. While the crews are bolting each pair of panels together, they’ll run a bead of silicon sealant on one of the panel flanges. “When you bolt them together, it’ll spread out and form a gasket,” he says.
This makes it easier to vacuum the liner in place and helps prevent ground water from seeping through and pooling behind the liner.
You can also place foam padding in front of the panels. This additionally conceals the seams, protects the liner from any friction behind it, and adds a softer touch to the final product.
6. Check all measurements.
On a rectangular pool, this is straightforward: Measure the four sides, then the two diagonals going from one corner to the opposite. On freeform pools, you must go through all the cross measurements and diagonals provided on the manufacturer’s plans.
“You could be off by more than a foot and it’ll look fine to the eye, but the vinyl liner will never fit,” Truehart says.
When making adjustments, other dimensions may be thrown off. Double-check everything to make sure nothing was jostled. This may take two or three go-arounds.
Finally, check the tops of the panels in case they haven’t been kicked out of place.
7. Pour the concrete foundation.
To provide extra stability, pour a layer of concrete around the overdig, behind the panels. Called a collar or foundation, it can range in depth from 6 inches to a couple feet, depending on manufacturer specifications and the application.
When building a waterfeature or other heavy element next to the pool, some builders pour the foundation up to deck level in that area.
Be careful not to place the concrete too quickly, or the weight may push the panels out of position. Build up 1 foot at a time, at the most.
If, like Johnson, you like a little concrete to flow underneath each panel, make sure it doesn’t ooze to the front.
Check again to make sure everything’s level and plumb.